E-Archive
Cover Page
in Vol. 9 - November Issue - Year 2008
Advances in X-ray Diffraction Equipment Used to Quantify Shot Peening
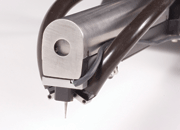
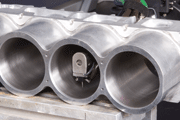
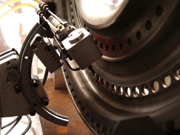
XRD residual stress measurement goniometer with 16 mm diameter x-ray tube and 6 mm x-ray detectors measuring inside a 60 mm diameter bore
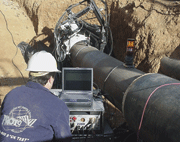
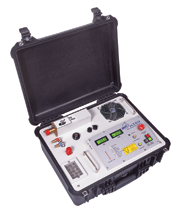
Portable residual stress measurement system being used in a harsh environment

Specialized XRD instrument for measuring axial stress inside 50 mm diameter pipe (left). Specialized goniometer for measuring hoop residual stress inside bolt holes (right).
Proto Mfg.
Residual stresses present in manufactured components, assemblies and structures can significantly improve or diminish their useful life. Proto Mfg. Ltd. has been helping companies for over 20 years with the measurement of residual stresses in the laboratory, on the shop floor and in the field by providing both sales of standard and custom instrumentation as well as measurement services.
X-ray diffraction (XRD) is used extensively to quantify the residual stress from surface enhancements, such as shot peening. Since its inception, this method has evolved extensively, and particularly in the last 10 years, we have seen a significant change in the variety and type of XRD instruments available to the metal finishing community. Originally, residual stress measurement was performed using a modified analytical x-ray diffractometer; of the type used for powder diffraction. However, these systems suffered from a number of difficulties including: sample size limitations, non portability, and x-ray optics not always optimized for residual stress measurement. About 25 years ago, companies started to manufacture dedicated residual stress diffractometers; being optimized for residual stress measurement they were able to overcome many of the difficulties associated with doing measurements with a powder diffractometer. However, many of these systems were still quite large and had great difficulty handling complicated part geometries. Improvements have been made over these early designs including smaller and more flexible systems, but sizing down has been limited by the lack of small components for x-ray diffractometers.
Quite often, failure critical locations that have been peened are in locations with limited access. Many of these complicated geometries can been difficult to measure using x-ray diffraction, and would normally involve a combination of strain gauging and sectioning to allow access for a residual stress measurement. The goniometer in an XRD system typically contains both the x-ray tube and the x-ray detectors. Historically, x-ray tubes for residual stress measurements have been 30 mm or 60 mm in diameter. Miniaturization of the goniometer has generally been limited by the size of the x-ray tube and x-ray detectors commercially available. Recent advances in x-ray tube technology have enabled the creation of 20 mm and 16 mm x-ray tubes. These smaller tubes allow the creation of smaller goniometers and thus access to locations that have limited access. Reduction in the size of the goniometer also requires reduction of the x-ray detector without any loss in resolution of the system. Detectors as small as 6 mm in width are now available that can easily capture diffraction peaks for stress measurements. Some of the smallest goniometers can now fit inside bores as small as 60 mm in diameter.
In addition to smaller goniometers we are seeing a trend towards smaller control units. Many are now less than 15 kg and can be easily hand carried. In fact complete units can be easily carried and setup by a single operator. No longer are systems restricted to use in the laboratory. Large parts that can not be moved can be measured on-site. Some units are even being made to survive in harsh environments and can operate in environments that would be unheard of 20 years ago.
In addition to decreases in the size of the system, the systems have many features that are now becoming quite common. Many of these features are automated providing additional measurement features and simplified operation. The increased speed in data collection enables residual stress maps to be generated on flat, curved, cylindrical and spherical geometries using automated X, Y, Z axis translation stages and automated rotation stages. Automated rotation of the goniometer phi axis enables the measurement of residual stress in multiple directions without having to rotate the part or reorient the XRD system.
Highly customized solutions are also becoming more prevalent, with specialized goniometers, built to perform very specific tasks. The need to quantify residual stress is so important that these customized solutions are very cost effective in the long run by preventing costly failures when the parts are in service. In fact, there has been a significant increase in adding residual stress specifications directly onto a part blueprint thereby forcing the manufacturer to ensure that peening has been done correctly to the required residual stress level.
In the future, it is expected that we will see further reduction of component size and therefore more interesting variations of XRD systems for residual stress. The future tool kit for quantifying residual stress using XRD in peened components is looking to be quite interesting.
For information:
Proto Mfg. Ltd., 2175 Solar Crescent
Oldcastle, Ontario, Canada, N0R 1L0
Tel: 1-519-737-6330 Fax: 1-519-737-1692
Email: proto@protoxrd.com web: www.protoxrd.com
Proto Mfg. Inc., 1980 East Michigan Ave,
Ypsilanti, Michigan, 48198
Tel: 1-313-965-2900 Fax: 1-734-485-5732
Email: proto@protoxrd.com web: www.protoxrd.com


