E-Archive
Articles
in Vol. 12 - March Issue - Year 2011
High-Tech Contour Evaluation Of ALMEN Test Plates

Fig. 1: The variation of test specimen

Fig. 2: Principle of real time testing

Fig. 3: Typical arrangement for experimental STRIP-ROUND verification

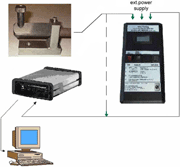
Fig. 4: Sensor head SPM-02a

Fig. 5: Calibration instructions for SPM-02a real time measuring device

Fig. 6: MarSurf

Fig. 7: STRIP-curvature lengthwise and also surface condition (18mm dia batch)

Fig. 8: STRIP-curvature square (18mm dia batch)

Fig. 9: ROUND-curvature lengthwise and also surface condition

Fig. 10: ROUND-curvature square

Fig. 11: ALMEN-STRIP topography

Fig. 12: ALMEN-ROUND topography

Fig. 13: Real time graph simultaneously displaying ALMEN-intensity

Fig. 14: ROUND-static blocks mounted on a turbine blade (7 pieces)
The MarSurfJ LD120 allows highest accuracy in curvature gauging, and is therefore a perfect research tool to investigate ALMEN-STRIP and ALMEN-ROUND profiles.
Recapitulation
The ALMEN-STRIP method is a worldwide appropriated standardized routine application in the automotive-, aircraft- and many other industries. It is well known and used in high end processes, also in mass production. It is highly time consuming but well organized with regards to strip supply, application and documentation.
The far superior ALMEN-ROUND1) method is not actually industrially supported.
Physically/mechanically it is about the same, the main difference being the shape (Fig. 1) of the specimen and the way of geometrical measuring. The STRIP-system needs a complex multiple manual handling procedure, whereas the ROUND can be a real time reaction process with an immediate intensity result, but can also be used to monitor the arc height.
Scientific background procedures
When the ALMEN-ROUND technology (Fig. 2) was ready for presentation, testing and industrial introduction 20 years ago, it was fairly difficult to find out about topographic behavior of such mechanically deformed objects. At that time it was a scientific challenge to find the differences between an established test procedure and the ALMEN-ROUND variation with its extremely enhanced possibilities, not to mention substantial cost reductions.
At that time it was a philosophy of involved scientists and engineers to see sincere differences between the two ideas "STRIP-ROUND". Some research was done, but only limited interest has been shown from the scientific side. Also industry with its highly developed standardization, fully integrated administration and trained manpower did not seem eager to go for changes, not to mention some market strategic fears of the few international existing suppliers of consumables.
Various tests have been made. Such a preliminary procedure normally starts with a configuration as shown in Fig. 3.
A plate is populated with 4 piece STRIPS and 4 piece ROUNDS.
The set gets uniformly peened to a desired arc height, e.g. 0.25 mmA. Following that the STRIPS and ROUNDS will be individually gauged. The "STRIP" on a common "ALMEN"-gauge and the "ROUND" preferably with a purpose-made sensor SPM02a, in this case actually the standard real time measuring head (Fig. 4).
But soon it was clear that measuring results could easily be in the range of mainly STRIP-related error symptoms. This of course under conditions that the calibration as part of the ROUND-technique is strictly taken into account (Fig. 5)
Further basic research with latest technology
There are also other possibilities to go deeper into the subject. E.g. the new MarSurf™ LD120 instrument (Fig. 6) is the device exactly to find out about the deformation of the various specimens.
The procedure starts with the previously described STRIP-ROUND retaining plate (Fig. 3). After processing, the individual specimen has to be checked by the mentioned MarSurf™ instrument. The therein measured and calculated radius on the peened convex side in X and Z direction represents the figures for further investigations to find out about the behavior of a STRIP and a ROUND under the same treatment. Results can be seen in Fig. 7 and 8 for a STRIP and for a ROUND in Fig. 9 and 10.
Moreover it shows the roughness of the peened surface, also showing eventual damages by single misshaped shot particles.
Also a pictorial representation can give an idea how the deformation may look like, see Fig. 11 and 12 accordingly.
The results gained then can be discussed and scientifically worked out finally to get a standard, accepted by responsible experts. (A target that was not yet reached by the year 2010.)
Present situation
For the time being, the ALMEN ROUND concept can be used for non official testing and machine commissioning etc. Together with comparably simple software it is an outstanding tool for on-line intensity determination (Fig. 13), for nozzle performance monitoring and also it simplifies the set up for dummy applications (Fig. 14). In this example the workpiece (normally a scrap part) has been completed to a dummy using 7 piece ROUND-fixtures to carry the test-ALMEN-ROUNDS. For fixation it only needs a M6 or ¼"-thread. This is much simpler then the fixation of the standard ALMEN block.
References
1) Virtues & limitations of Almen Round in "SHOT PEENING ICSP8" by Lothar Wagner / Verlag WILEY-VCH
For Information:
Rudolf Bosshard
Anvil Developments
8604 VolketswiL Eichstr. 6 B, Switzerland
Tel. +41.44.99730.30
Fax +41.44.99730.32
E-mail: anvildev@bosshard.org
www.bosshard.org


