E-Archive
Articles
in Vol. 5 - November Issue - Year 2004
Italian Peening Job Shop to use X-Rays Diffraction Measurement

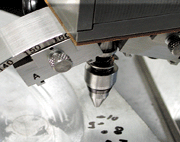
X-Rays Collimator and Sensors detail

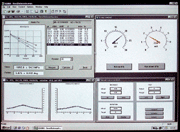
X-Rays Diffraction Pictures Software Analysis

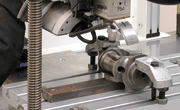
X-Rax Diffractometer of Stresstech used to optimise the Peening Process at Peen Service
Norblast has been manufacturing shot blasting systems since 1975. In 1985 the new branch Norblast „Service“ was completely dedicated to studying and applying the shot peening process. In 2000 the branch Norblast „Service“ acquired its own identity and became Peen Service, a research centre that cooperates with the most important aeronautic industries, formula 1 teams and many others to develop and apply shot peening.
New Mechanical Technologies
Almost 20 years have passed since the idea of establishing a research and development centre for the shot peening process was brought to light. Since then Peen Service has widened their services by offering their own research extensively improving the service life of components by increasing their resistance to fatigue. Today, the company invests in methodical and continuous research to support companies for that purpose.
Research, Experience and Instrumentation
The greater part of this research is based on the study of the response of metallic materials to cyclic loads. The variation of stress with respect to time that loads a component during its working cycle, is what is vaguely summarised by the term fatigue. Under fatigue load, microcracks start to develop on the surface, corresponding to the points where the stress concentration is maximum, and begin to propagate until a fracture occurs within the body. This usually takes place under modest loads but after very high working cycles. During the stages of design and development, fatigue is extremely dangerous and very difficult to predict and therefore, requires special attention. Peen Service studies the structural characteristics of the material measuring the residual stresses within the component, either over the surface or in the bulk material.
The Italian company has both a wealth of experience and technologically advanced machinery to serve its clientele with the utmost professionalism. The goal is to be always at least one step ahead of the client’s needs.
X-Rays Diffractometry
The laboratory is equipped with an instrument not very well known but of very high importance. The X-ray diffractometer of Stresstech is a non-destructive analytical technique of residual stress measurement of metals. The residual stresses within a component are nowadays considered the “fingerprint” of the overall technological process of the component itself. The analysis of the residual stresses can help to better understand the failure criteria.
Operating Principle
The structure of a metallic material is constituted by crystals whose atoms are arranged in an orderly structure (crystal lactice). An X-ray beam is projected onto the metal with a wavelength similar to the distance between the atoms of the crystal itself. The beam penetrates a few thousands of a millimeter into the metal. The beam finally collides with the atoms of the structure and is reflected back with characteristics induced by the stresses within the body. The residual stress within the body is calculated through the data obtained from the analysis of the incident and the reflected beam. This technique is extensively used either in the scope of research or as a way for optimising shot peening processes in terms of control and repeatability.
For Information: Peen Service
via Pollastri. 7, 40138 Bologna, Italy
Tel. +39.051.533 550, Fax 051.531 307
E-mail: info@peenservice.it
www.peenservice.it


