E-Archive
Articles
in Vol. 18 - May Issue - Year 2017
Surface Cleanliness Measurement Tool
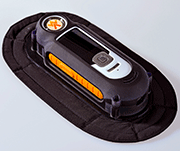
WA Clean Technology
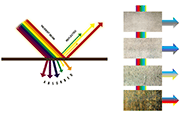
Working principle
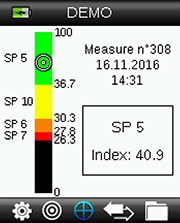
Cleanliness control interface
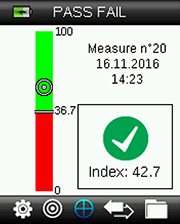
Pass / Fail interface
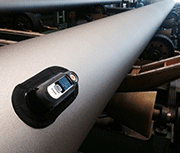
WA Clean is ideal for pipe coating, rail and steel plate
Abstract: Surface Cleanliness has been measured visually for the past 30 years using SSPC –VIS- 1 (ISO 8501-1) reference photographs. This method, while recognized as the industry standard, does have its disadvantages. It is deemed a subjective measurement rather than objective and is vulnerable to human error. This can be from experience level of the user to the condition of the visual reference chart itself; this often causes difficulties between operators, quality control and inspection personnel. There are also a great deal of external conditions that can affect the desired results wishing to be obtained, such as artificial light conditions and proximity of where the measurement is taking place.
Introduction
The WA Clean tool is a patented design by Winoa Group (W Abrasives) created to provide objective, reliable and repeatable surface cleanliness results based on mathematical values. It requires no ambient light and can be used in total darkness such as ballast tanks and in confined spaces (inside rail cars) where light is limited or nonexistent. Using the WA Clean, any operative can provide accurate and quantitative measurement. The key factor is the electronic optical method designed to evaluate the surface cleanliness after abrasive blast cleaning. The WA Clean has in no way been developed to replace SSPC-VIS- 1 reference photographs (ISO8501-1), but more to work in conjunction with both industry standards.
Characteristics and benefits of WA Clean:
• Exclusive patented technology.
• Easy-to-use solution for fast and accurate quality controls.
• Can be used in total darkness.
• Objective and reliable measurements (once calibrated).
• Possibility of re-blasting and over-blasting reduction.
• Reduced litigations with inspectors and/or end users.
• Easy to use interface – downloadable to spreadsheets for quality tracking.
• Rapid measurements (<5 seconds) with results displayed immediately.
• PC transfer via USB – No need to install any software.
• Internal storage is able to record up to 20 different references for multiple substrates.
• Magnetic sole enables fit to curved surfaces (this can be provided without the magnetic skirt so as to avoid any transfer of contamination, soluble salts, chlorides, to the surface).
• 2 working modes – Cleanliness values or PASS / FAIL mode.
Limitations:
• Convex surfaces: Minimum radius > 50mm (1.97 inch)
• Concave surfaces: Minimum radius > 150mm (5.91 inch)
• Small optical "eye" 81mm2
• Material – Titanium / Aluminum – No field test as yet.
• Stainless Steel – Works only after acid pickling.
• Foundry castings / Forging shops.
How it works
The WA Clean is an easy to use solution for fast and accurate quality controls.
An array of color is beamed to the surface of the substrate to measure. As the indent beam hits the surface, certain spectrums of color are absorbed and at the same time reflected off the surface. It is this reflected light that is measured by the "eye" of the device and transformed in to a unique cleanliness level index from 0 to 100. Using index figures, the number is entered and referenced against standard industry SSPC –VIS- 1 (ISO 8501-1) photographs. For example, if the blasted surface is found to be SP10/NACE2 (Sa2.5) and the index value given is, say 65, this will be deemed to be the minimum value for that degree of cleanliness. As the blasting cleanliness increases towards a SP5 (Sa3), the index number will be higher, say 80. As with the visual reference photographs, prior to any measurement, the WA Clean needs to be told the starting rust grade, A/B/C/D.
Again, using the industry standard reference photographs, the device can be entered with a unique index number. Taking a selected number of measurements, the average surface rust coloration will have an index of say, 10. Any value below this figure, the device will say that the surface is NB (Non- blasted) so on and so on. For a more accurate measurement the WA Clean indexes can be set to all the levels of current cleanliness grades, SP7 / SP6 / SP10 / SP5 (Sa1 / Sa2 / Sa2.5 / Sa3) also if so wished, NACE 1/2/3/4 can be used. The device can also be used in PASS / FAIL mode for industries that do not use reference photographs (foundries for example). Again for example, as explained above, if the minimum specification calls for a surface to be no lower than an acceptable reference, the WA Clean can be calibrated to that required index. Should the reading be lower than the given value, the device will say the part is in FAIL. The discretion of the user or quality department can then determine if the substrate is subject to additional blasting.
Case Studies
The WA Clean was developed through committed time and involvement of pilot customers, mainly pipe-coating facilities. It is used today not just in pipe coating but rail and steel plate manufacturers.
A large manufacturer and coater of steel pipe for the gas industry using FBE (Fusion Bonded Epoxy) in Russia demonstrated that the WA Clean can be used and has written this in to their Quality Control procedures.
The WA Clean has not currently been field tested in the Peening Industry. The focus in 2017 will be to conduct tests in the Technical Facility in Houston, Texas, USA in collaboration with R&D facility in Europe. The method intended to be used is in fact opposite to the method currently used for determining cleanliness of blasted substrates. The use of Coverage strips will be the test piece and given the percentage of dark area obtained in 1T, the device should be able to be set to a factor index that correlates with the standard currently used in determining coverage. Theoretically, from this, the customer should be able to define whether a part is under- or over-peened dependent on the required specifications. As previously stated, the WA Clean can store 20 programmable references and should be able to distinguish between influencing factors such as; Flow rates, Peening time, Media, and Elements of the substrate.
|
WA CLEAN satisfaction survey: Credibility of the device: 9/10 (high confidence)
"Very happy with the tool, find it very useful, especially at nighttime or when not enough light"
Satisfaction level: 9/10 (highly satisfied)
"All people very happy with it, even head of workshop wanted to help with certification"
Testimony: "we managed to solve disagreement with inspectors thanks to WA CLEAN" |
Author: Craig Wallbank
Technical and Training Center Manager
of Winoa USA, Inc.
Tel. +1.936.253 5301
Cell phone: +1.281.853 5463
E-mail: craig.wallbank@wabrasives.com
For Information:
Winoa USA, Inc. Technical & Training Center
18527 Imperial Valley Dr.
Houston, TX 77073 USA
www.wabrasives.com


